Packages & Favorites

Packages & Favorites in ProFilmet ROES

The Favorites and Packages functions allow you to group together commonly used products, customized templates, and your unique packages. A small initial time investment has many benefits:

Favorites

The Favorites Tab in ROES is the container to hold all of your packages, your Designer Suite templates, and any individual products you want to keep grouped together.

To create a Favorite for a single product:

  1. Favorites Tool BarGo to the Favorites Tab.Get there by clicking the Favorites Button at the bottom of the product window. This will take the place of the Sizes Palette; to go back, simply click it again.
  2. 2. Create a New Group Tab.Click the plus icon at the top left to add a new tab to your Favorites. Name your new group and hit Enter.
  3. Set up your product.Toggle away from Favorites and find the product you want to save. Customize it as much as you want. Remember, saving the product to favorites will save your options, text and Designer Suite customizations.
  4. New Favorite Text BoxSave your product.When you are ready to save, click the Add Favorite Button and type your name into the box. Hit Enter. You will see "Saved!" appear in the box, and your new Favorite will be available in the tab you selected. Keep In mind that your Favorites will appear in alphabetical order the next time you open ROES.

Favorites in ProFilmet ROES

The ROES features shown in this video may have changed. Be sure to read the Quickstart Guide and other tutorials (where available).

Packages

Packager

A package is a collection of products. You can add any product in ROES to a package, whether it has multiple image nodes or text nodes.

To create a Package:

  1. Select your First Product.
  2. Turn On the Package Creator Module.Package Creator Module

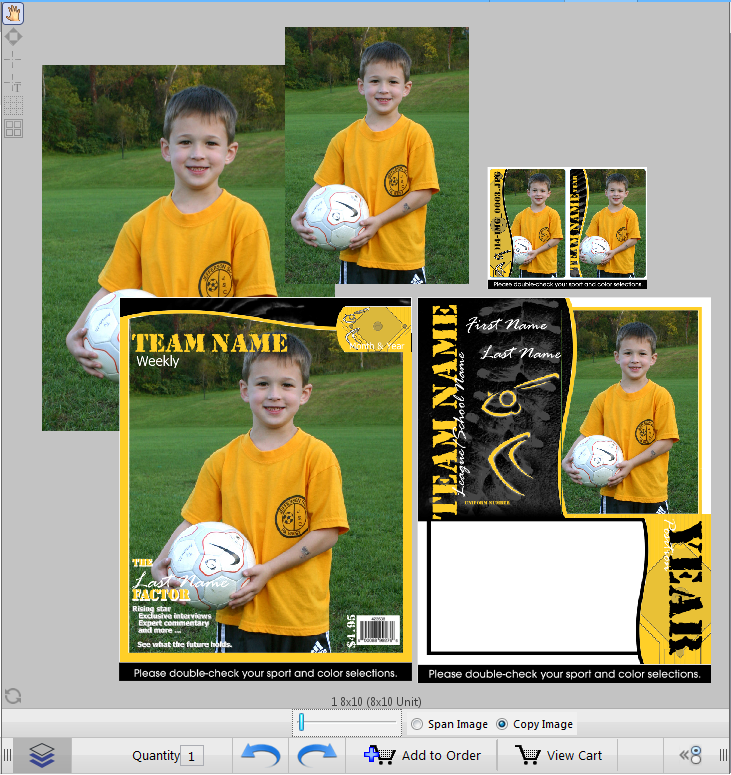
    Click on the Packages Icon in the lower left corner of the workspace. A Links button, workspace zoom slider, and Span Image / Copy Image / Individual selector will appear.

  3. Add Another Product.

    Navigate to the next product and drag it from the Sizes Palette into the main workspace. Repeat until you have all the products you want in your package.

    Note: Be sure to hold down the mouse and drag the product into the workspace. Just clicking on the next product will cause that product to replace your package in the workspace.
  4. Arrange your Workspace.

    You can move package items around the workspace by selecting the blue crosshair in the middle of each product. Moving an item to the edge or using the slider at the bottom expands your workspace.

  5. Link Image Nodes to Work Together.Link Icon

    By clicking the small link icon, you can link image nodes together. These nodes will function as one: dropping an image into one automatically drops it into the other(s); cropping and rotating one will crop and rotate the other(s). If the icon is blue, the node is linked. Linking is on by default. Use the Links button to turn the feature off or on; use the individual links on each product to affect just that image node.

    You can unlink images while creating your order: Click the Packages Icon, then the Link Icon of the image node you want to crop, then the Package Icon. For the next player, select the package from the Favorites palette again to reload a fully linked package.

    Note: Only one image can be linked. So, if your package contains a Memory Mate, an individual 8x10 and a 5x7 team image, you can only link the individual nodes together or the team nodes in that package.
  6. Set your Options and Text Nodes.

    As with single-item Favorites, saving your package will save options and text. Each time you choose that package, those items will already be set for you.

  7. Set your quantities.Set Item Quantities

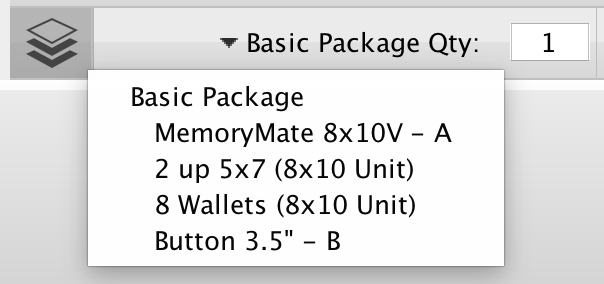
    You can set quantities on individual items in a package with the drop-down menu next to the Package Creator Module button. Select the item, type your quantity in the qty box and hit Enter.

    Item quantities will show on the items' labels in the workspace and also in the tooltip that appears when you hover your mouse over a package in the Favorites Tab.

  8. Save your package.

    When your package is ready, toggle the favorites and choose (or create) your group. Click the Heart/Plus button and type your package name into the text box that appears. Hit Enter. You can make changes to an existing package and save those current changes to the package by clicking the Heart/Arrow icon.

Packages in ProFilmet ROES

The ROES features shown in this video may have changed. Be sure to read the Quickstart Guide and other tutorials (where available).